A failed DHCP server, minor network glitches, problematic cache files, and MAC address filtering are the most common causes of the issue. We’ll walk you through the steps to potentially resolve your network problem.
Reboot Your Router
Your router’s minor glitches are often why your devices can’t acquire an IP address. This usually results in a “Failed to Obtain IP Address” error on an Android phone. One way to get around these minor problems is to restart your router. Doing so turns off your router’s features, including DHCP that assigns IP addresses, and restarts all these functions. You can power off your Wi-Fi router by pressing the Power button on the device. If your router offers no Power button, use the power socket switch to turn your router off and then back on. With certain routers, you can perform a reboot by accessing the router’s settings page in your web browser and selecting the reboot option.
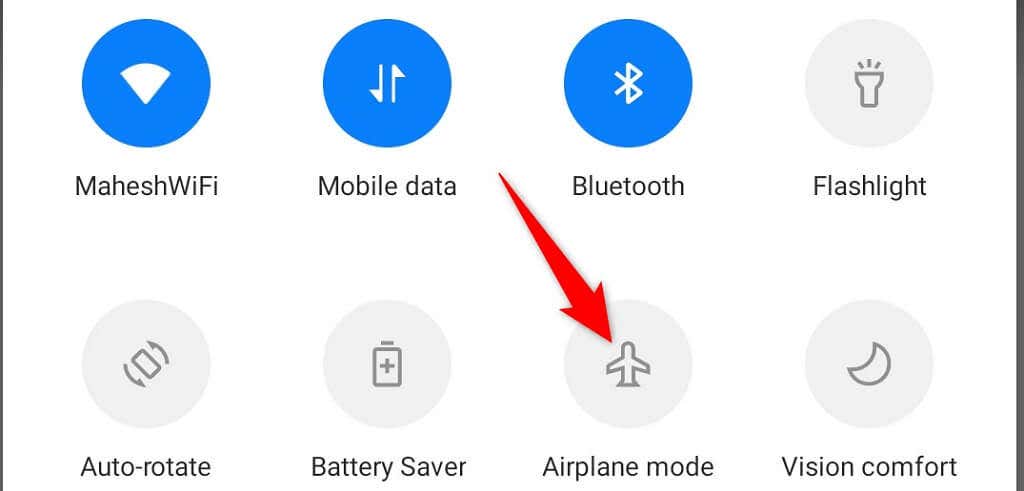
Turn Airplane Mode On and Back Off to Resolve the Obtain IP Address Error
When you experience a network problem like “Failed to Obtain IP Address,” it’s worth turning your phone’s airplane mode on and then back off. Doing so disconnects your phone from all your networks and then reconnects to all networks. This should fix most minor network problems with your device. You can enable airplane mode by pulling down from the top of your phone’s screen and selecting Airplane mode. Then, wait for five seconds and turn the mode back off by tapping the Airplane mode tile. After enabling and disabling airplane mode, your phone should successfully connect to your network.
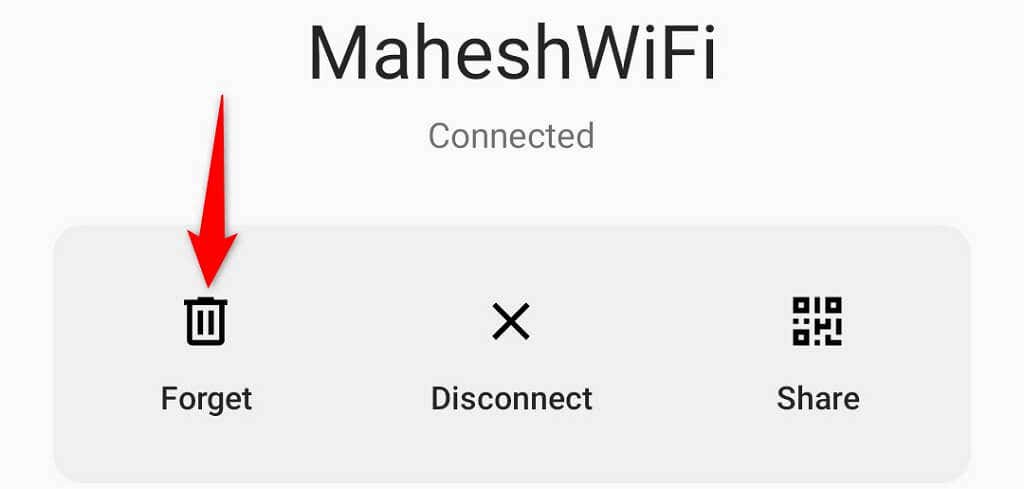
Forget and Reconnect to the Wi-Fi Network
If you still get a “Failed to Obtain IP Address” error on your Android phone, try forgetting and rejoining your Wi-Fi network. This resolves any saved network configuration problems. Your phone will acquire an IP address and successfully connect to your network.
Clear the Google Play Services Cache on Android
Google Play Services is an Android utility that provides core functionality to your installed apps and system functions. When you experience system-level problems, like “Failed to Obtain IP Address,” it’s worth clearing this utility’s cache files. The cache files may have gone corrupt or become problematic for various reasons. Clearing the files should likely resolve your problem and let you successfully connect to your wireless networks.
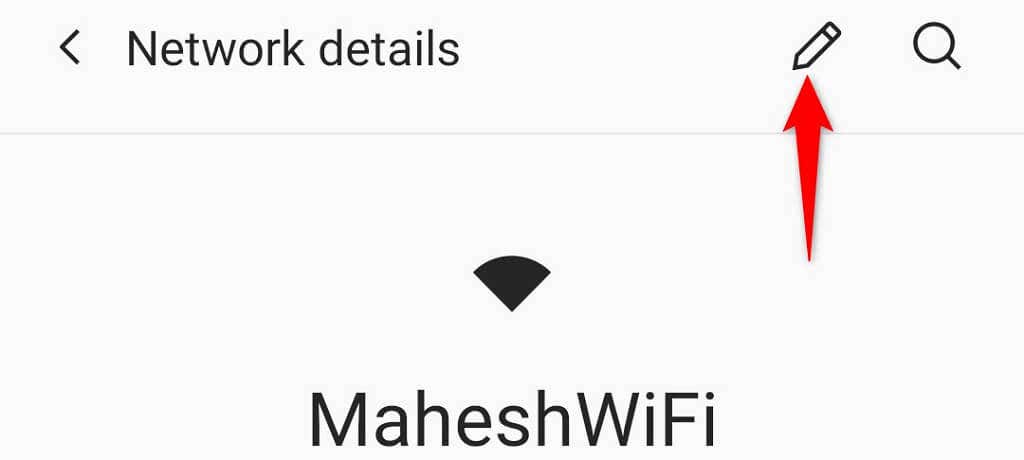
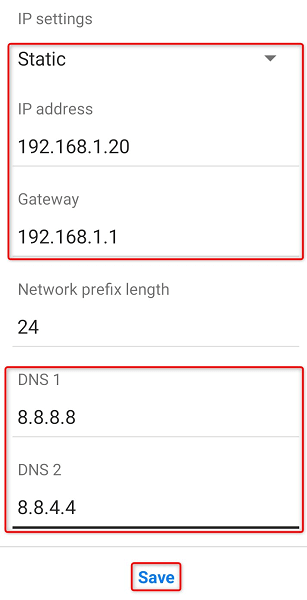
Use a Static IP Address on Your Android Phone
Your Android phone receives a unique IP address from your router’s DHCP feature. If that feature ever stops working or becomes problematic, your phone gets no IP address, resulting in a “Failed to Obtain IP Address” error. One way to potentially fix that is to use a static IP on your Android phone. This way, your phone already knows what IP to use when you connect your phone to your wireless network. Here’s how to configure a static IP on Android:
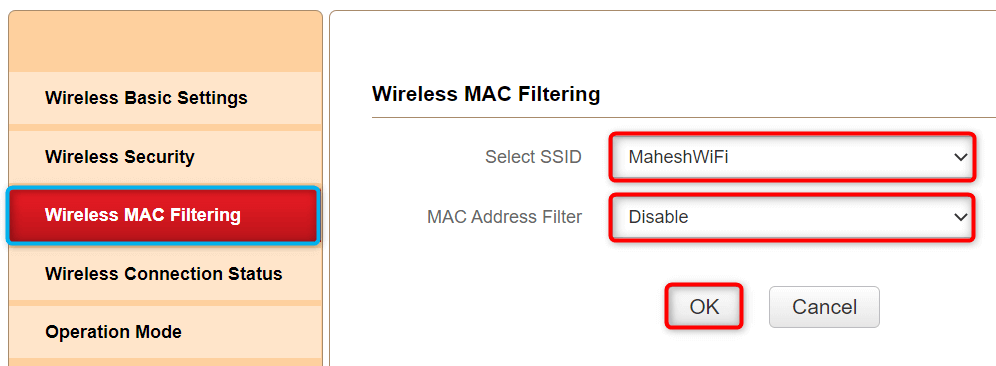
Turn Off MAC Filter for Your MAC Address
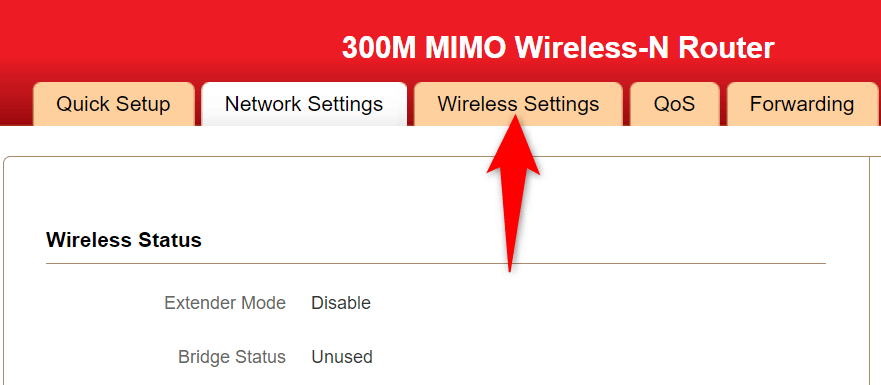
Most routers offer a MAC address filtering option that you can use to block specific devices from connecting to your network. Your Android phone displaying a “Failed to Obtain IP Address” error could result from your phone being on the MAC filter list. This is an unlikely scenario, especially if you’ve never blocked any MAC addresses on your router, but it’s worth checking just in case. You’ll have to review your MAC block list and remove your Android phone from there. Once you’ve done that, your phone will connect to your network and get an IP address. Note: We’re using an iball 300M MIMO Wireless-N router in our examples. Your router’s interface will look different, but you should see a category for accessing wireless configuration that features the same settings we’re covering in this article.
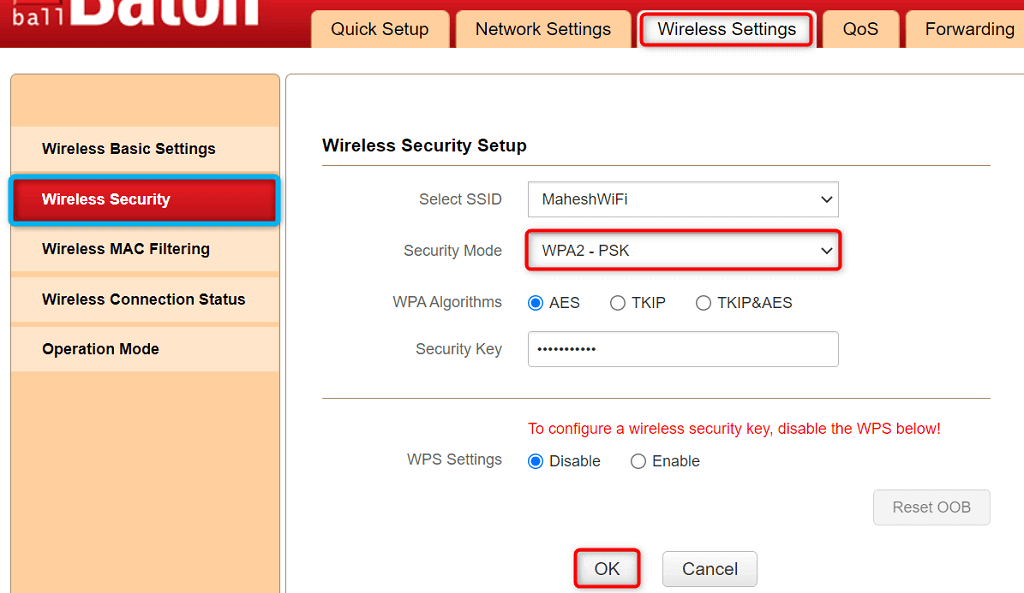
Change the Encryption Method to WPA2-PSK for Your Network
Most routers offer multiple encryption methods to secure your network. Sometimes, some of these methods aren’t compatible with your Android phone, thus causing the “Failed to Obtain IP Address” error. In this case, change your router’s wireless security mode to something widely compatible, like WPA2-PSK. That should resolve your issue.
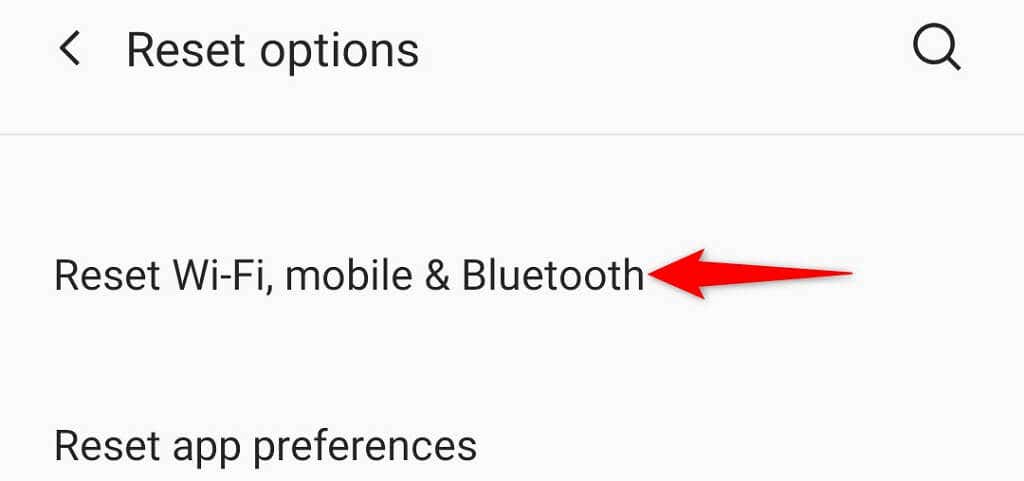
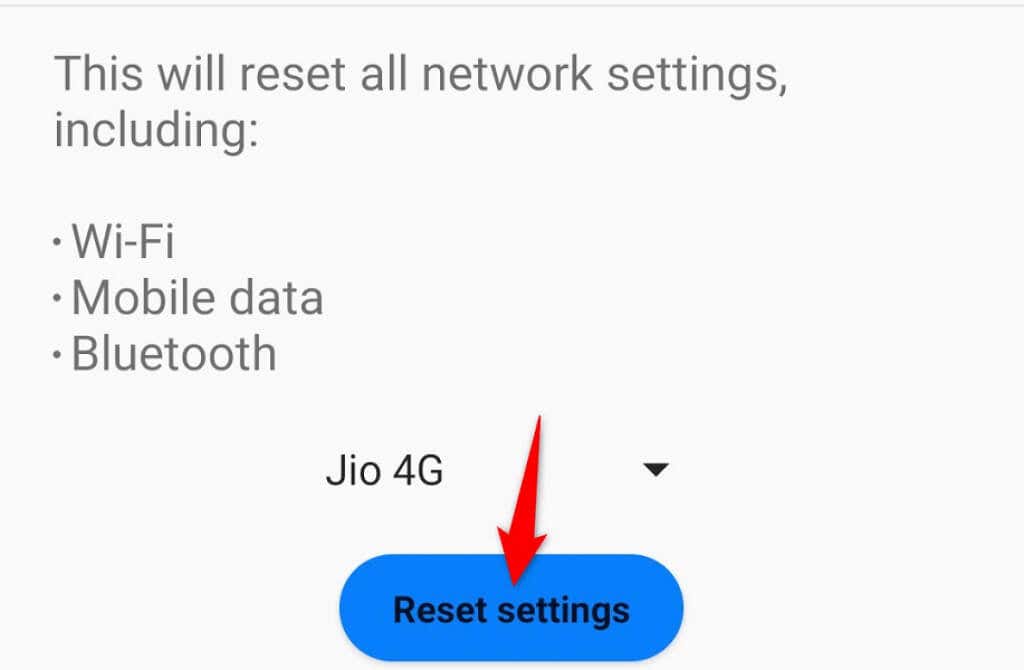
Reset Network Settings on Your Android Phone
If your Android phone still displays a “Failed to Obtain IP Address” error, your phone’s network settings likely have issues. You can fix these settings by performing a network reset. A network reset erases all your network-related settings and allows you to re-configure them. Here’s how you can do that.
Make Your Android Device Successfully Acquire an IP Address
Android’s “Failed to Obtain IP Address” error prevents you from accessing the internet on your phone. If you ever experience this issue and struggle to get an IP address for your phone, try out the methods outlined above. Your phone will then successfully connect to your network, allowing you to access the internet.