You might want to merge two or more songs if you’re making a playlist and you want them to play one after the other without any pauses. This is common with some YouTube albums where the creator will upload all the songs merged into one video. Another reason to merge sound files is if you’ve recorded voice memos or a voiceover, but there are lots of umms and other unnecessary parts. You can delete those sections and then merge the other clips together to make a continuous file. Detailed below are several ways to merge MP3s and other audio files. You can pick whichever method you think would work best for your situation. Tip: If your audio files need to be in a different format to work with any of these websites or programs below, or if you want the exported file to exist in some other audio file format, there are free ways to convert your audio to a different format.
How To Merge Audio Files Online
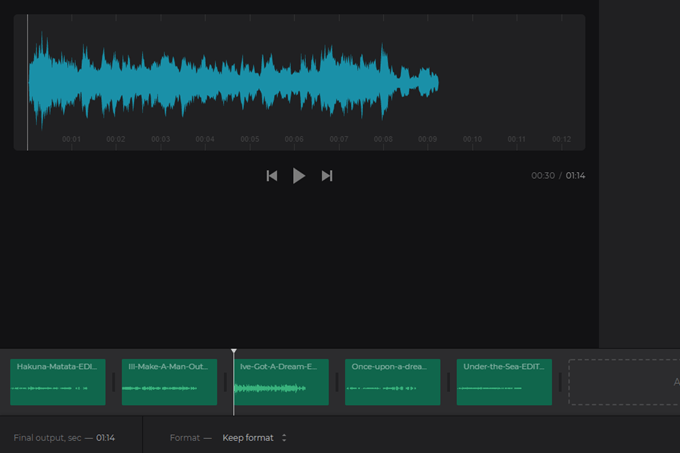
Audio Joiner is a website dedicated to merging audio files online. This means you don’t have to download anything to make it work. Just upload the tracks you want combined and then download the single file when you’re done. Here are some of its notable features:
Supports fade in and fade out.You can clip out a section to use from each file.Lets you reorder the files.Choose the specific second in the file to start and end it.Export the merged file to MP3, M4A, WAV, or FLAC.Download the file to your computer or Google Drive or Dropbox account.
Clideo’s Audio Joiner is a lot like the other online song joiner above, but this one has a few extra features you might prefer. Plus, the way the site is designed makes it feel easier to just throw up a few songs and merge them without doing any editing, which might be what you’re after.
Open files from a URL, your computer, Dropbox, or Google Drive.Export to the same format as the songs or save the merged audio file to AAC, AC3, AIFF, APE, CAF, FLAC, or M4A.Save the file to your computer or pick your Google Drive or Dropbox account.
If these two options aren’t what you’re looking for in an online MP3 merger, try Audio Editor or Ofoct.
Clip & Merge Audio With Audacity
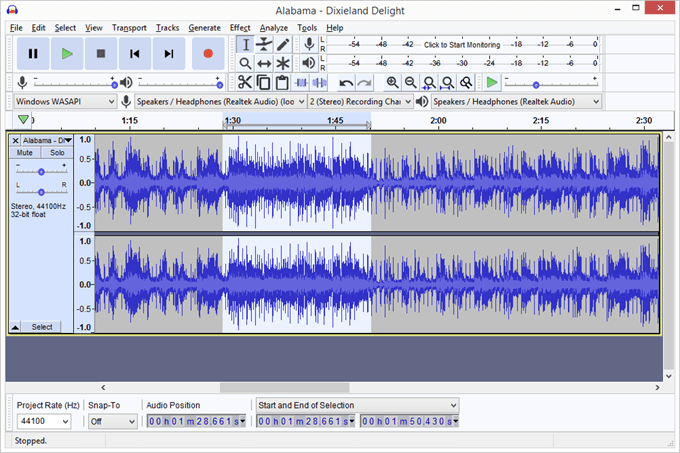
If a simple upload-and-merge isn’t what you’re after because you need to edit the songs or recordings before merging them, Audacity is what you want. It lets you remove background noise, add effects to the songs, and easily join multiple files together to make a long recording/song. Here’s a quick rundown on how to use Audacity to clip and merge audio files:
Use the File > Open menu to import the audio file you want to trim up.Once it’s loaded, click-and-drag over any area of the song to highlight what you want to delete, and then press the Delete key. Feel free to zoom up as close as you need to, to find the exact parts you want to clip out.
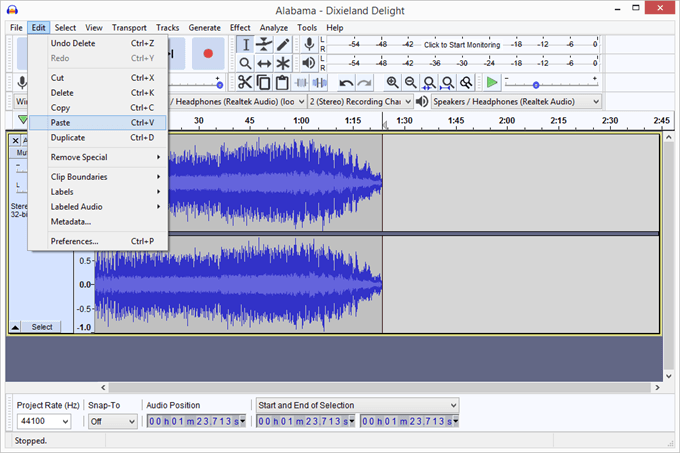
Repeat steps one and two to edit the other audio file you want merged with this one.Select all of the second one, copy it, and then return to the window of the first one you edited.Go to the beginning or end (wherever you want the other audio file placed) and use the Edit > Paste menu item to put the copied clip next to the other one.
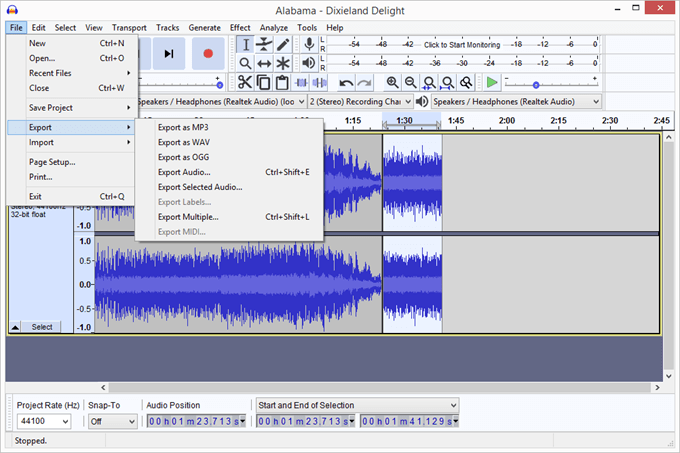
Repeat these steps as many times as you need to so that all the files are edited and merged just how you want.Go to File > Export to pick an audio file format to save the merged file to. Your options include MP3, WAV, OGG, FLAC, M4A, WMA, and a few others.
Tip: Be sure to check out our piece on how to cut, edit, and remix music and songs online for more audio editing tips.
Use The Windows Command Prompt To Merge Files
This shouldn’t be your first option unless you like messing around with Command Prompt, but it’s still neat that you can do this without downloading any programs or opening a song joiner website. One downside to this method for merging files is that you have to type each song name into Command Prompt, or at least rename your songs to make them easier to type.
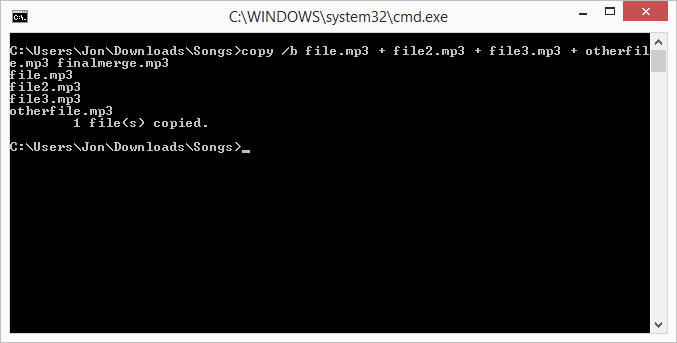
Open Command Prompt.Change the directory to where your audio files are. Here’s an example:
Enter this command, where every file name corresponds to the files you’re dealing with: Notice that we’re merging four songs in our example. The very last part, called finalmerge.mp3, is the name we’ve chosen as the new file. All the other instances are the names of the files we’re merging.
Tips On Merging Audio Files
If you need to use the audio from a video, you can extract the sound from it pretty easily. Just make sure you aren’t violating any copyrights doing so. Most songs have a little bit of silence at the very end. If you want your merged songs to play seamlessly, remove those gaps in Audacity or the other audio editors mentioned above. Just play the song over as many times as you need to so that you know for sure that before you export the audio, there aren’t any unwanted silent spaces. On that note, if you want areas of silence between your songs but they don’t already exist, Audacity is a great way to make those. Use the Generate > Silence menu item anywhere within the recording to add empty spaces of any length you choose.


